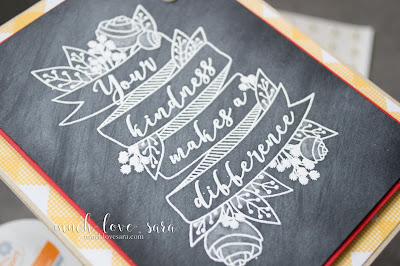
It's super easy to create the look of chalkboard art on a handmade card. Ready to try it?
I began today's card with the Black Licorice Card Stock. I cut the card stock to 3.75" x 5", and stamped the image from the Your Kindness stamp in Clear Pigment Ink, and sprinkled it liberally with embossing powder. After that was heat set, I used the Whip Cream PanPastel and the largest sponge applicator from the PanPastel set, to "scribble" on the background. This lays down a layer of soft "chalky" looking haze. If the PanPastel is too opaque, lightly brush a baby wipe over the background to remove a bit of color, and add to the streaky look. To finish the image, I used a dry blending brush and the Whip Cream PanPastel to add a bit of shading to the flowers and leaves.
I matted the "chalkboard" panel onto a piece of Candy Apple Card Stock, and then added that to the printed paper background. The whole card front was attached to an Oatmeal Cookie Card Base. A few pearls added some more texture and the finishing touch.
Thanks for stopping by!
Much love,

Fun Stampers Journey Supplies Used:
Stamps: Your Kindness ATS AT-0287 (Bloom Benefit)Inks: Clear Pigment Ink IP-0102, Journey White Embossing Powder IP-0098, Party Pop PanPastels JM-0081
Papers: Oatmeal Cookie 8.5" x 11" Card Stock CS-0023, Black Licorice 8.5" x 11" Card Stock CS-0003, Candy Apple 8.5" x 11" Card Stock CS-0007, Sunday Adventure Prints PP-0053
Embellishments: Pearls AC-0024
Tools: Journey Blooms Paper Trimmer TO-0039, Crease Tool TO-0040, Heat Gun TO-0083, Blending Brush - Small TO-0097
Adhesives: Easy Glide Permanent Adhesive Runner AD-0081, Journey Foam Squares - Medium AD-0085


Great technique. Thanks for sharing. Have a great weekend Sara! <3
ReplyDelete