The mixed media options from Fun Stampers Journey, were one of the first things that drew me towards the company. I loved creating canvases, and other pieces using a wide variety of products, and seeing all of my favorite things in one place made me happy!
And then, I really didn't get around to using them much. Mixed media projects, for all their fun, are a bit more time consuming than cards - just allowing for drying time and clean up, they take a while. But, I've been itching to work on something, so I pulled out a bunch of supplies and got to work.
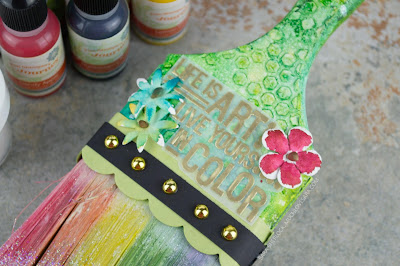
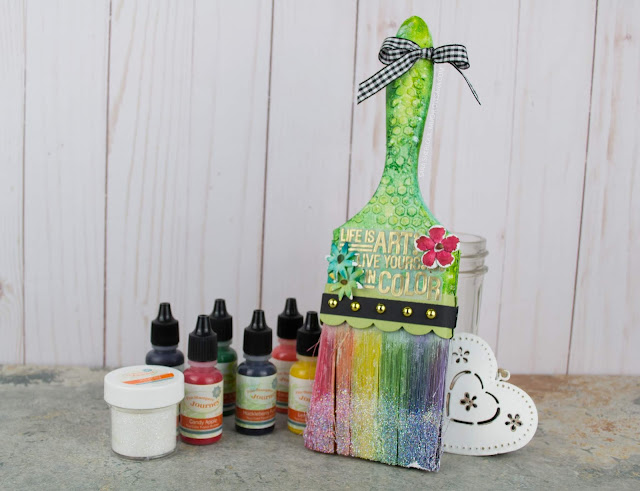
I started out with a paintbrush I had purchased from the dollar store. Because this had a bit of a glossy finish, I gave the handle a quick sanding, before adding multiple coats of gesso to the handle and finial. I used my heat gun to dry the gesso a bit quicker in between layers. After the final layer was dry, I added some modeling paste through a stencil. I sat that aside for a couple of hours to dry thoroughly, before coming back to use reinkers to dye the bristles of the brush.
I used gloves to keep my hands clean, and started with the yellow ink. I put a few drops of reinker up where the bristles attach to the brush, and then worked them down the length, adding more reinker as necessary. Then I moved on to other colors, repeating the process. When that was done, I set the brush aside, again for a couple of hours, to allow the ink to dry. I did wind up coming back to that and adding a thin layer of gesso over the top - this both muted the color somewhat, as well as giving the bristles a little more texture for the reinker to dry to.
I covered the bristles with a paper towel to spray the handle. I layered the Color Splashes, drying with my heat gun between layers, until I was satisfied with the color result. I then generously sprinkled the whole project - handle and bristles - with sparkle silk.
I heat embossed my sentiment onto vellum and fussy cut it out, and die cut two border strips, as well as a strip of Black Licorice. I used White Liner tape to adhere the two border pieces together, and then adhere the border around the bottom of the finial. I added the Black Licorice strip with the white liner as well. Then I attached my sentiment using liquid glue.
Before moving on to further embellishment, I spread a thick line of craft glue on my work surface, and then ran the bottom portion of the bristles back and forth through the glue a few times. Then I carefully sprinkled the sparkle dust over the glue, and knocked off the excess. I laid the brush down to dry, and attached the Fashion Gold pieces, along with the ribbon to the handle and flowers. After the glue had dried, I came back with my blending brush and some silks, to add a bit of messy color to the flowers. Once the whole piece had dried overnight, I again knocked off the excess sparkle dust, in order to help keep the glitter fallout to a minimum.
This was a super fun project. One thing I love with mixed media is how your project changes with each added layer. And each project is unique. Even using the exact same products, each person creating will have a slightly different result.
Thanks for stopping by!
Much love,
Supplies Used:
Use this easy list to find the products I used in my projects. (Contains affiliate links - where I earn a commission from purchases made from my links, at no cost to you. Your support helps me keep this blog going, and continue to create - Thank you! Affiliates and disclosures can be found here.)

Stamps:
Color Pop Stamp Set SS-0613
Inks:
Candy Apple True Color Fusion Re-Inker RI-0001, Huckleberry Fusion True Color Fusion Re-Inker RI-0012, Lemon Drop True Color Fusion Re-Inker RI-0026, Limeade Splash True Color Fusion Re-Inker RI-0025, Grape Fusion True Color Fusion Re-Inker RI-0033, Citrus Cooler True Color Fusion Re-Inker RI-0047, Clear Pigment Ink Pad IP-0102, Gold Embossing Powder IP-0101, Sparkle Silk IP-0126, Cool Pool Color Splash IP-0076, Lemongrass Color Splash IP-0078, Shimmer Gold Color Splash IP-0081, Blue Lagoon Color Splash IP-0084, Cranberry Bliss Silk IP-0094, Gold Silk IP-0096, Turbo Teal Silk IP-0119
Candy Apple True Color Fusion Re-Inker RI-0001, Huckleberry Fusion True Color Fusion Re-Inker RI-0012, Lemon Drop True Color Fusion Re-Inker RI-0026, Limeade Splash True Color Fusion Re-Inker RI-0025, Grape Fusion True Color Fusion Re-Inker RI-0033, Citrus Cooler True Color Fusion Re-Inker RI-0047, Clear Pigment Ink Pad IP-0102, Gold Embossing Powder IP-0101, Sparkle Silk IP-0126, Cool Pool Color Splash IP-0076, Lemongrass Color Splash IP-0078, Shimmer Gold Color Splash IP-0081, Blue Lagoon Color Splash IP-0084, Cranberry Bliss Silk IP-0094, Gold Silk IP-0096, Turbo Teal Silk IP-0119
Papers:
Lemongrass 8.5" x 11" Card Stock CS-0019, Black Licorice 8.5" x 11" Card Stock CS-0003, Journey Vellum PP-0044
Journey Sparkle Dust AC-0013, Sweet Blooms AC-0329, Gingham Ribbon Black Licorice AC-0096, Fashion Gold AC-0292
Tools:
Border Basics Die Set DI-0144, Journey Platinum Machine TO-0090, Journey Blooms Paper Trimmer TO-0039, Crease Tool TO-0040, Detail Pro Shears (4.5") TO-0063, Heat Gun TO-0083, Journey Blending Brush - Large TO-0099
Adhesives:
White Liner Tape AD-0001, Journey Craft Glue AD-0111


LOVE! LOVE! LOVE!
ReplyDelete