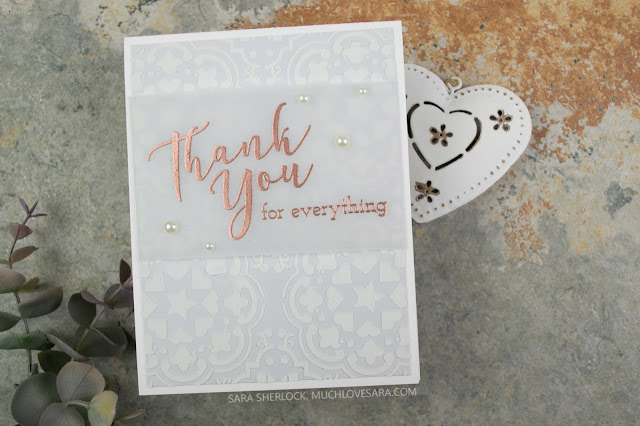
When I saw the catalog for the first time, there were three things that I knew for sure. #1 - the new Tin Pail Card Stock was going to be a favorite. #2 - I was completely ga-ga over the Copper and Rose gold items. And, #3 - the cement tile stencil was a MUST HAVE.
For today's card, I applied Modeling Paste through the Cement Tile stencil onto Tin Pail Card Stock. I allowed that to dry, before trimming the edges slightly to take off the rough bumps that tend to happen when you use modeling paste on a surface that's slightly smaller than the stencil. You can scrape the sides off, but sometimes that leaves a thin streak along the edge, so I much prefer trimming the dried panel.
I stamped and heat embossed the Thank You and For Everything sentiments onto a panel of vellum, and wrapped that around the Tin Pail panel. Then I added a few pearls, and adhered the card front to a Whip Cream card base.
Didn't it turn out so pretty? I'm considering this design for thank you cards for the holidays...maybe on Fresh Sage...
Thanks for stopping by!
Much love,
Supplies Used:
Use this easy list to find the products I used in my projects. (Contains affiliate links - where I earn a commission from purchases made from my links, at no cost to you. Your support helps me keep this blog going, and continue to create - Thank you! Affiliates and disclosures can be found here.)

Stamps:
Many Thanks ATS AT-0280
Inks:
Clear Pigment Ink Pad IP-0102, Copper Embossing Powder IP-0148
Papers:
Whip Cream 8.5" x 11" Card Stock CS-0040, Tin Pail 8.5"x 11" Card Stock CS-0147, Journey Vellum PP-0044
Pearls AC-0024
Journey Modeling Paste JM-0073, Cement Tile Stencil JM-0118
Spatula TO-0089, Journey Blooms Paper Trimmer TO-0039, Crease Tool TO-0040, Heat Gun TO-0083
Adhesives:
Easy Glide Permanent Adhesive Runner AD-0081


Wow! Your card is absolutely gorgeous!
ReplyDeleteThanks Karen!
Deleteso gorgeous
ReplyDeleteThanks!
Delete