Monday, July 20, 2020

You Are My Sunshine | Crafty Friends Blog Hop ft Ellen Hutson's Essentials by Ellen

Hello!

It's that time of the month again!  Time for another Crafty Friends Blog Hop.  If you have not joined us for one of our hops before, the Crafty Friends Blog Hop is a group of friends who have all shared some common crafty beginnings, and we hop each month with a spotlight on a company we love. 

This month we have chosen to spotlight the Essentials by Ellen line at Ellen Hutson.  Ellen has graciously given us a coupon code to share with our readers - good for today and tomorrow, on all Essentials line products.  (Did you see the cute new floral stamps just released?  Plus there are tools, and papers in the line.)

For today's card, I'm using a stamp set that has been around for a bit, but I absolutely adore this chubby little bear.  This is the All Inside Stamp Set, and the sentiments that are in the set are great for all occasion or encouragement cards.  


To begin this card, I stamped the Bear and Sun Images in Amalgam ink, onto white card stock.  I colored them in with just a few Copic markers, then die cut them with the coordinating dies (which, are sadly out of stock, at the time I am writing this post. The stamp set is still available, however.).  I also die cut one of the heart shapes from some coral card stock, to fit into the bear's arms.  


I cut a panel of banana card stock, and stamped the Sunshine sentiment, repeatedly, in banana ink.  Then I stamped the sentiments onto black card stock, and white heat embossed them. Then, to add a little more weight to the Sunshine on the sentiment, I used a white pencil to fill in the space between the outline.  

I layered the pieces together, along with a vellum oval that I die cut, then attached the card front to a white card base.  A few gold pieces completed the card. 


Don't you just love that cute little bear?  Be sure to go check out the  Essentials by Ellen line, and use the code CRAFTYFRIENDS on your purchase for a 20% discount.  

From here, the next stop in today's hop, is Lydia at Understand Blue.  

For your convenience, here is a list of all of the stops today, just in case you get turned around.  

Sara Sherlock (You are here!)
Lydia Fiedler


Thanks for stopping by!


Supplies Used:

Use this easy list to find the products I used in my projects. (Contains affiliate links - where I earn a commission from purchases made from my links, at no cost to you. Your support helps me keep this blog going, and continue to create - Thank you! Affiliates and disclosures can be found here.)

Please note, when possible, I try to offer multiple sources for the items I use.

Tuesday, July 14, 2020

Picket Fence Studios July Release

Hello!

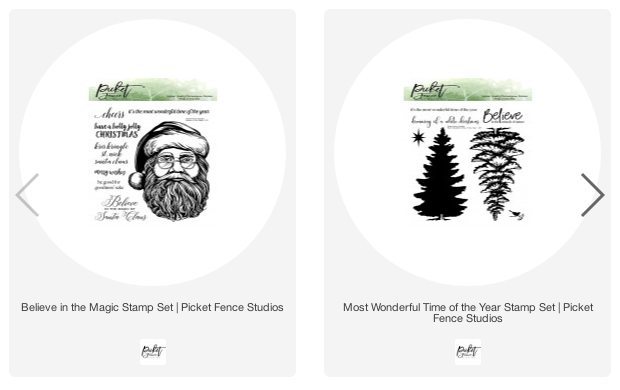
It's the 14th of the month, which means it's time for a new release from Picket Fence Studios.  I'm excited to share my samples with you (And this month I'm sharing a craft FAIL, and how it was saved!).  But, first, here is a quick peek of the entire release.


My hubby and I are both huge fans of Halloween and Christmas.  We decorate outside of our house like crazy for both holidays, I try to dress up most years to hand out candy to trick or treaters, and I make tons of Christmas goodies for friends and neighbors.  So, it makes sense that Halloween and Christmas releases are some of my favorite stamp releases each year.  

As always, I have several cards to share with you, today, using these new products.  All of the products used in these cards will be listed at the bottom of this post, for reference. 

Card #1 | Most Wonderful Time of the Year

When I first saw the Jack-O-Lantern Stamp, this card instantly sprang to mind.  This is one of the 3.5"x 3.5" stamps from Picket Fence Studios, that can be repeated, by stamping the image side by side.  So, I lined it up in my MISTI, and stamped it - twice to cover the entire card front - onto Deep Lilac card stock, with VersaMark ink, and heat embossed it in gold. 

Once the image was cooled, I used a small sofft sponge slipper to apply 930.5 Bronze PanPastel to the Jack-O-Lanterns.  Any mistakes were quickly removed with a pink eraser.  I set that panel aside, and stamped and gold heat embossed the sentiment from the Most Wonderful Time of the Year Stamp Set onto Black Licorice card stock.  With the pumkins, I think this sentiment takes a playful, yet a little sinister, turn.  I adhered the panels together, and trimmed everything down to card front size.


The card front was adhered to a white card base.  A little Black Licorice Twine, and a few rhinestones finished this card off. 

Card #2 | Magic is Real

The Autumn Harvest Stamp, is another that can be used to create repeating backgrounds.  For this card, I stamped the image - twice to cover the card front - in Black Hybrid Ink, onto River Stone card stock. I added a border at the top and bottom of Citrus Cooler card stock to bring in a little color.


The sentiment came from the Inside Quotes Christmas Stamp Set.  The stamp I used actually reads "Christmas Magic is Real", but I was easily able to mask off the Christmas portion, to stamp and gold heat emboss the rest of the sentiment onto Black Licorice card stock.  I adhered this onto the card front with foam tape.  


The card front was attached to a black card base, and then a few Black Magic Sequins were added to finish the card. 

Card #3 | Baby It's Cold Outside

For this card, I used the Flower of Life Stencil on top of a piece of white card stock.  The stencil was held in place by a little Pixie Spray on the back side.  I used a Life Changing Blending Brush, to blend Speckled Egg Distress Oxide Ink through the stencil, fading it out just over the halfway point on the card stock.  


I then stamped the gnomes from the Baby It's Cold Outside Stamp Set, in Whisper Ink, and colored them in with Prismacolor Pencils.  The sentiment, was stamped at the bottom of the panel with  Lavender Fusion Ink.  


The card front was adhered to a white mat, then a white card base.  As a final touch, I applied a little Nuvo Shimmer to the snow drifts beneath the gnomes.  

Card #4 | Believe

This card was another that popped into my head as soon as I saw the stamp set.  I began by stamping the full tree image from the Most Wonderful Time of the Year Stamp Set, in Fresh Forest ink, onto Denim Days card stock.  I briefly heat set the ink, as well as generously used my Embossing Magic bag over the ink, before stamping the detailed layer in VersaMark, and white heat embossing it.  


I cut a free hand wave into some painters tape, to use as a mask along the bottom of the card.  I applied Whip Cream ink below the mask.  Once the mask was removed, I applied Scattered Straw, Picked Raspberry, and Peacock Feathers Inks around the tree to create the colorful sky background.  I tapped on some Sparkle Silk, as well as creating a few dots with my white gel pen to add the stars.  


Once all the inks were set, I stamped and heat embossed the star at the top of the tree in gold.  I also stamped and gold heat embossed the sentiment onto a strip of vellum. The vellum wrapped around the card front, and then the card front was attached to a white card base. 

Card #5 Be Good for Goodness' Sake

This finished card is nothing like I planned. The changes to the original plan, were the result of a massive craft fail.  I began with stamping the Santa image from the Believe in the Magic Stamp Set in Barely There ink, and coloring it in with Prismacolor Pencils. 


Here's where this card had a massive fail.  After finishing my coloring, I set the image aside while I stamped the Reindeer Games Stamp, onto white card stock, with Candy Apple ink.  

I lost control of the ink pad. 

It flew out of my hand, somersaulted through the air, and landed - PAD DOWN - onto my colored image. 


Now, if you've worked with red ink, you know it stains.  

Like, a LOT.  It's permanent on paper.  

There was no removing it, and trying to do so was simply going to smear it further.

I'm a slow colorer, so it had taken me a long time to get Santa the way I wanted, and in just a millisecond it was ruined.  I was devastated, and had to walk away from the craft room. 

After a while had passed, I was able to come back and complete this card - though with a little layout change.  I stamped the Believe in the magic sentiment in Black Hybrid Ink onto a piece of white card stock, then stamped the Be Good sentiment beneath it in Candy Apple ink - making certain to move EVERY finished element off my desk to a safe spot first!  I die cut the sentiment panel, and then laid the die onto a piece of Black Licorice card, and used a craft knife around the outside edge to create the black frame.  Then I layered the pieces together onto the Reindeer background, with Santa peeking up from the bottom of the card, and nearly all of the red trimmed off! 


I matted the card front with some Candy Apple card stock, and attached it to a white card base.  A few Gin and Tonic Sequins added a little sparkle to finish off the card. 

Card # 6 | Have a Holly Jolly

For my final card, I used the Santa image from the Believe in the Magic Stamp Set again.  This time, I stamped Santa in River Stone ink onto Tin Pail card stock.  I added some light shading with Prismacolor Pencils, mostly focusing on adding a little pink to his cheeks, a red tint to the hat, and white to his hair and the trim on the hat. 


I set that panel aside, while I stamped and white heat embossed the sentiment onto Cool Pool card stock, that I cut a fish tail banner on one end.  I adhered that to the card front with foam tape, on top of a strip of Black Licorice Sparkle Tape that was cut at an angle.  


Rather than matting the card front with straight edges, I off set it onto a mat of Bubble Gum card stock.  The card front was attached to a white card base, and Gin and Tonic Sequins were added to complete the card. 


Thanks for stopping by!


Supplies Used:

Use this easy list to find the products I used in my projects. (Contains affiliate links - where I earn a commission from purchases made from my links, at no cost to you. Your support helps me keep this blog going, and continue to create - Thank you! Affiliates and disclosures can be found here.)

Tuesday, July 7, 2020

Honey Bee Stamps Summer Release

Hello!

I'm so excited for today's post.  I'm part of the Honey Bee Stamps Summer Release Blog Hop.  If you have already been hopping, you are joining me from Mindy's blog - Welcome!


Today, I'm sharing some projects made with three of the new stamp sets (and their coordinating Honey Cuts).   Let's start with two of the sets, that pair together perfectly - The Birds of Paradise (+ Honey Cuts), and Tropical Tweets (+ Honey Cuts).


I started all three of the following cards, by stamping the bird images onto white card stock, in black ink, and coloring the birds in with Prismacolor colored pencils.  I die cut each bird with the coordinating die, and set them aside as I created backgrounds.  (A full supply list, with links to all of the products used in the cards today, will be at the bottom of this post.)

Honey Bee Stamps Summer Release 2020 | Handmade Cards created by Sara Sherlock, featuring Honey Bee Stamps Birds of Paradise, Tropical Tweets, and Paradise Blooms Stamp and Honey Cut Die sets.  Tropical themed cards, with exotic birds and flowers.

The background on this first card, was created by blending Cracked Pistachio, and Peacock Feathers Distress Oxide Inks onto white card stock.  I stamped the frond stamp in Fresh Forest Ink around the top and sides of the blended panel.  Once the inks were dry, I stamped and white heat embossed the same stamp around the edges.  Then I sprinkled the background with a little water, and then some Sparkle Silk.   I stamped and white heat embossed the sentiment onto Blue Lagoon card stock, and then die cut the sentiment with the coordinating die.  I also die cut two more layers with the same die, out of Rich Coral and Summer Days card stock.  I layered the sentiment diecuts with a bit of liquid glue - allowing the two bottom layers to peek out from the top and bottom.  Everything was adhered together with liquid glue, and foam tape, and attached to a white card base. 

Honey Bee Stamps Summer Release 2020 | Handmade Cards created by Sara Sherlock, featuring Honey Bee Stamps Birds of Paradise, Tropical Tweets, and Paradise Blooms Stamp and Honey Cut Die sets.  Tropical themed cards, with exotic birds and flowers.

This second card features a lot of ink blending in the background.  I used a circle stencil to create the sun, and blended Abandoned Coral, Spiced Marmalade, Scattered Straw, and Peacock Feathers Distress Oxide Inks into the sunset scene.  Once the scene was created, I splattered the top half with a little water, and used a blending brush with water to add some wavy lines over the water portion of the scene.  I also added a little shimmer to the water.  I attached the Flamingos I had previously stamped, colored and die cut, and a sentiment that I had stamped and white heat embossed onto vellum, then die cut.  The card front was attached to a white card base.   

Honey Bee Stamps Summer Release 2020 | Handmade Cards created by Sara Sherlock, featuring Honey Bee Stamps Birds of Paradise, Tropical Tweets, and Paradise Blooms Stamp and Honey Cut Die sets.  Tropical themed cards, with exotic birds and flowers.

For the third card, I ink blended some Scattered Straw Distress Oxide Ink onto white card stock.  I then stamped the leaf images with Fresh Forest Ink, and colored them in with my Prismacolor pencils.  I stamped and white heat embossed the sentiment onto black card stock, die cut it, and then adhered everything with liquid glue and foam tape.  I matted the card front onto black card stock, before attaching it to a white card base.   A few self adhesive pearls finished the card.  


For the next two cards, I used the pretty floral images from the Paradise Blooms Stamp Set and coordinating Honey Cuts.  

Honey Bee Stamps Summer Release 2020 | Handmade Cards created by Sara Sherlock, featuring Honey Bee Stamps Birds of Paradise, Tropical Tweets, and Paradise Blooms Stamp and Honey Cut Die sets.  Tropical themed cards, with exotic birds and flowers.

On this first of the floral cards, I stamped all of the images with Antique Linen Distress Ink, and then watercolored all of the images with Distress Inks (colors in the supply list at the bottom of the post).  Once the images were dry, I die cut them out, and arranged them onto a piece of black card stock.  This card is very dimensional as each layer is popped up on foam tape.  I stamped and white heat embossed the sentiment, then die cut it, along with two additional pieces of black card stock.  I stacked the sentiment die cuts, and adhered the stack to the image with liquid adhesive.  I attached the card front to a white card base, and then added a few black Nuvo drops the the background.   

Honey Bee Stamps Summer Release 2020 | Handmade Cards created by Sara Sherlock, featuring Honey Bee Stamps Birds of Paradise, Tropical Tweets, and Paradise Blooms Stamp and Honey Cut Die sets.  Tropical themed cards, with exotic birds and flowers.

For this final card, I stamped and heat embossed the branch image, in three different colors of embossing powder, onto River Stone card stock.  I die cut my "mahalo" letters, using the Bee Bold Lowercase Honey Cuts.  One set of letters was cut from Blue Lagoon card stock, and one set from Mirror Gold card stock.  These were adhered together - slightly offset - with liquid adhesive.  I stamped the floral image with Whisper Ink onto white card, and quickly colored them with Prismacolor pencils.  The flowers were die cut and layered on the background  with the "mahalo" letters, using foam tape and liquid glue.  The card front was attached to a white card base.  

Honey Bee Stamps Summer Release 2020 | Handmade Cards created by Sara Sherlock, featuring Honey Bee Stamps Birds of Paradise, Tropical Tweets, and Paradise Blooms Stamp and Honey Cut Die sets.  Tropical themed cards, with exotic birds and flowers.

I had such fun creating these cards to share with you today.  Did you have a favorite?  Don't forget that Honey Bee Stamps is giving away a $25 gift certificate on their blog today.  

If you are continuing on the hop, the next stop is Kelly Martin.  

For your convenience, I'm including a list of all of the stops for today's hop.  Be sure to leave comments along the way, as Honey Bee Stamps is giving away a $25 gift certificate! 

Sara Sherlock  (You are here)
>> Kelly Martin << (Next stop)

Thanks for stopping by!


Supplies Used:

Use this easy list to find the products I used in my projects. (Contains affiliate links - where I earn a commission from purchases made from my links, at no cost to you. Your support helps me keep this blog going, and continue to create - Thank you! Affiliates and disclosures can be found here.)

Please note, when possible, I try to offer multiple sources for the items I use.